If you’re a beginner looking to create a website but don’t know where to start, Wix is the perfect solution. Wix is a powerful, user-friendly platform that makes website building quick and easy, no matter your level of technical expertise.
In this blog post, we’ll take you step-by-step through the process of creating a website with Wix.
We’ll show you how to choose the right design for your site, add content, customize your page, and more. By the end of this post, you’ll have a website you can be proud of!
Creating an account

If you’re new to Wix, the first step is to create an account. Creating an account is fast and easy, and it’s free. All you have to do is enter your email address and choose a password. Once you’ve done that, you can start creating a website with Wix.
When creating an account, you also have the option to upgrade your plan if you want access to more features and services. But for now, let’s keep it simple and stick with the free version. Once you’ve created your account, you’ll be taken to the Wix Editor – the platform used to build and design your website.
All you need to do to begin is go to the main website for Wix, click the Get Started button, and then sign up for an account.
Picking the type of website that you want to make
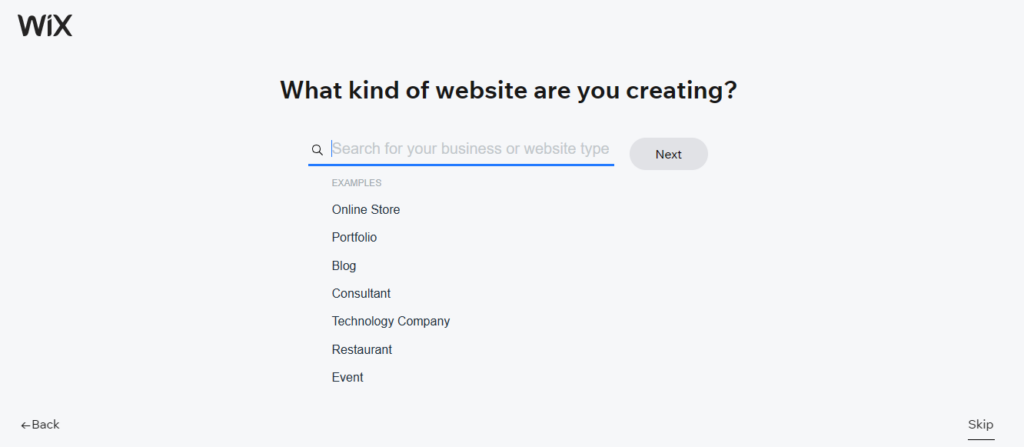
At this stage, you have two options. Build your website from scratch or let the Wix ADI build it for you. We recommend allowing the ADI to create the website for you. It is more efficient.
Once you decide which option you want, you’ll need to choose the type of website you want to make. Do you want an eCommerce store, portfolio, or something else? Each of these types of websites requires different features, so you’ll need to think carefully about what your needs are. Fortunately, Wix makes it easy for you to find templates that fit your needs and customize them with their drag-and-drop editor. Once you’ve chosen the template that works best for you, you’re ready to start building your website.
- Click on Start Now.
- Wix will ask you a series of questions about the type of business you want the website for.
- Once you select your type of business, Wix will suggest a couple of features that may be important for your business website. The suggestions may vary depending on your business, Wix may suggest a booking feature for B2B & B2C businesses.
- Choose your business name
- Next, Wix will ask you to import some of your content
Choosing a template

The most important step in creating a website with Wix is choosing the right template. Templates are the basic foundations that you use to create your website. With Wix, you have a wide range of options to choose from. You can pick from hundreds of professionally designed themes that can be used to create a beautiful website. When selecting a template, think about the look and feel that you want to create for your website. It should reflect your business or brand and make sure it looks professional. After you have selected the template, you can customize it to make it your own and create a website with Wix that is unique and stands out.
Customizing your website

Creating a website with Wix can seem overwhelming at first, but the platform makes it easy to customize and personalize your website in whatever way you’d like. Once you’ve chosen a template that suits your needs, you can begin making changes. The Wix Editor allows you to drag and drop elements wherever you’d like them to appear on the page. This makes it easy to design the exact website you have in mind, no coding required.
You can adjust the style of the text on your website by choosing from a wide selection of fonts, font sizes, and font colours. You can also customize background colours and image effects. If you want to create a website with Wix that looks professional, it’s important to use visuals that match your branding. You can easily add logos, videos, and images with the Media Library tool.
In addition to making design changes, you can also use the Wix Editor to add content to your website. This includes adding text, contact forms, maps, social media buttons, and more. With Wix, it’s easy to create a website that reflects your unique style and personality.
How to optimize the site for mobile (step-by-step guide)
In the age of smartphones, having a mobile-optimized website is essential for any business or brand. Fortunately, creating a website with Wix that is optimized for mobile devices is relatively straightforward. Here is a step-by-step guide on how to make sure your Wix website looks great on mobile devices:
- Go to the mobile preview option in the site editor
When you are in the Wix editor, click on the mobile preview icon at the top of the page. This will give you a live preview of how your website will look on a mobile device. - Adjust your mobile layout
You can change the mobile layout of your website by clicking on the ‘Edit Mobile Layout’ button. This will give you options to adjust how the page elements are displayed on a smaller screen. You can also move and resize elements to make sure your website looks great on a mobile device. - Add mobile-only features
You can add features such as a mobile menu and contact buttons that are specific to mobile devices. These features can be found in the Wix App Market and are easy to install and customize. - Review your website
Once you have finished optimizing your website for mobile devices, make sure to test it out on various devices. This will help you ensure that everything looks great and functions correctly.
Creating a website with Wix that is optimized for mobile devices is essential for any business or brand. Following these simple steps will make sure that your Wix website looks great on both desktop and mobile devices.
How to create pages – About Page and Contact Page
The next step is to create some other pages that will benefit most websites. Among them are:
A page about yourself this page contains a contact form.
To illustrate how to build new pages, let’s focus on just these two for now.
A brief description of our company
You can start by clicking on the Page: Home button on the top left. Click on + Add Page.
Additionally, Wix provides some pre-designed pages, so you don’t have to start from scratch.
Pick the design you like best from the list of available page designs to complete your About page.
The Wix ADI editor will reload the interface and let you work on your new About page. The ins and outs of how everything works are the same as with the homepage.
Just enter what you want in each section of the About Me page, and make edits accordingly.
Spending a few minutes on your About page, it’ll look pretty good.
Contact Page
To create a Contact page, again, click the Page button and add a new Page. Enter Contact in your web browser and see what Wix has for you.
From among the proposed designs, select one.
This page may display some of the original blocks from your About page, or even the homepage when you reload the Wix ADI editing interface. The following are among them:
forms of contact
a map that can be interactive
It is recommended that you use both these elements to make it easier for customers to find your business. The contact form is fully functional, which allows visitors to send you messages directly.
How to create a blog on Wix

Creating a blog on Wix is straightforward, allowing you to create and manage your blog quickly. Here’s a step-by-step guide for creating a website with Wix:
- Go to the app market and search for blog
- Add the Wix blog to your site. It is free to install
- Here you can edit the content in much the same way that you would any other page on the site. In other words, you can
- control what’s displayed in your blog posts
- and modify the blog layout (the placement of images, etc.)
- alter what is displayed alongside the posts, including their date and author.
Launching an e-commerce store
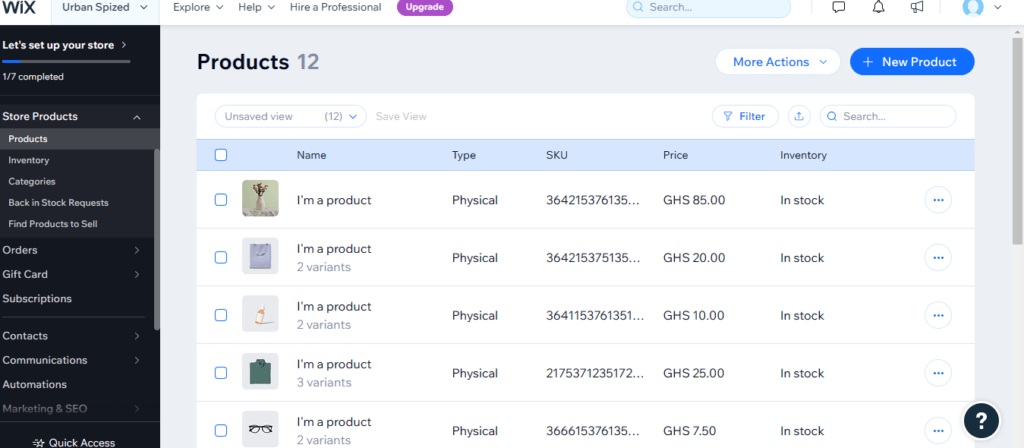
Do you want to create a website with Wix that sells your products and services? You can easily set up an e-commerce store on Wix, allowing you to promote and sell your products online. With Wix, you can build a professional e-commerce store in just a few steps.
The first step is to choose a plan that includes an online store. Once you have chosen the appropriate plan, it’s time to get started. Wix offers an easy-to-use drag-and-drop editor that allows you to design and customize your e-commerce store. With this, you can add images, text, and product pages to create a visually appealing store. You can also add features such as customer reviews and product ratings to help you better showcase your products.
Once you have designed your store, you must add payment options. Wix offers several integrated payment solutions, allowing you to accept payments from major credit cards, PayPal, Apple Pay, and more.
The next step is to add products to your store. Wix allows you to add descriptions and photos of each product, as well as set prices, stock levels, shipping rates, and other options. You can also set up discounts for specific items or customers.
Finally, you will need to configure your shipping and tax settings. Wix provides options for setting up flat rates or calculated shipping costs based on customer location or product weight. You can also configure sales tax settings for different countries and states.
With these simple steps, you are now ready to launch your e-commerce store with Wix!
Get to know the main Wix dashboard
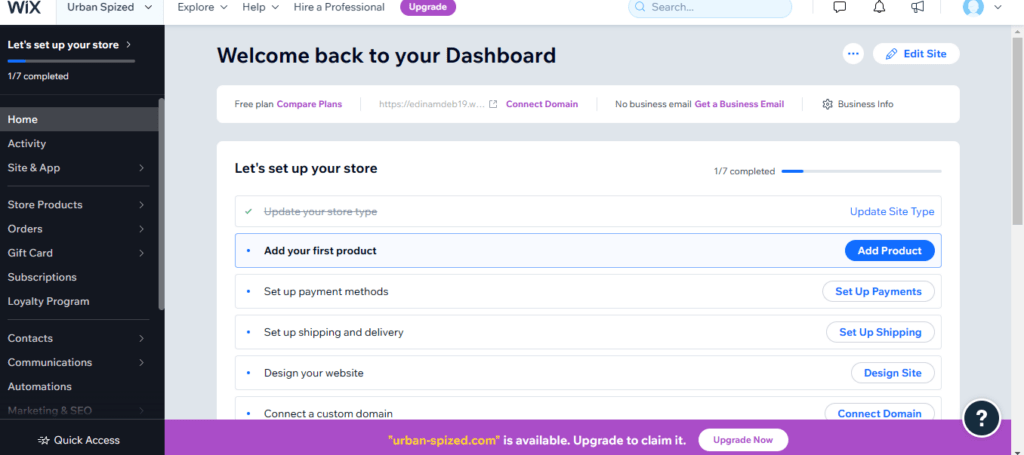
Navigating the Wix dashboard is a key component of creating a website with Wix. The Wix dashboard is the centre of operations for your website. It provides you with access to all the tools, features and settings you need to create your dream website.
(a) -The section of the site where you can quickly access each aspect of your online presence. Blog posts, products, blog posts, or orders can be managed from there if you have an online store. Additionally, links to other Wix applications, as well as to an online editor are provided, landing you at the Wix ADI editor we used previously.
(b) – The most important control panel on your site, where you’ll perform the vast majority of site management actions.
(c) – Follow these steps and make sure that your website is all ready for viewing.
Adding functionality via apps
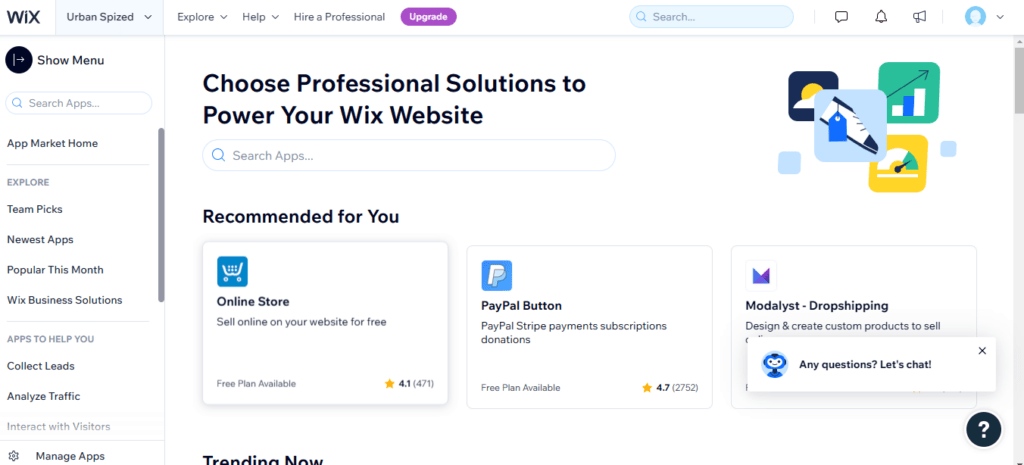
When creating a website with Wix, you can make it as dynamic and powerful as you want by adding functionalities via apps. Apps are like plug-ins that let you add different features to your websites, such as contact forms, social media feeds, and more. You can choose from a wide range of apps available in the Wix App Market and install them onto your website.
Installing an app is really simple – all you need to do is select the app, click ‘Add to site’, and then customize the settings according to your needs. Once you have installed an app, it will be added to your site as an element that you can drag and drop in any position you like.
Adding apps is a great way to increase your website’s capabilities and enhance its user experience. With apps, you can easily add functionality like contact forms, galleries, maps, etc., and customize it according to your own taste. Furthermore, Wix also offers a variety of free and premium apps, allowing you to pick the ones that best suit your website and budget.
Creating a website with Wix is incredibly easy. Even if you have no prior experience in building a website, the platform’s user-friendly tools and intuitive design make it easy to build a professional website from start to finish. With its drag-and-drop editor and a selection of templates to choose from, Wix provides an accessible solution for creating a website that looks great. Whether you want to create a basic website or an online store, Wix can help you bring your ideas to life with ease. All in all, Wix is a great choice for anyone looking to create a website with Wix.

Are you enjoying your time on JBKlutse?
Articles like these are sponsored free for everyone through the support of generous readers just like you. Thanks to their partnership in our mission, we reach more than 50,000 unique users monthly!
Please help us continue to bring the tech narrative to people everywhere through relevant and simple tech news, reviews, buying guides, and more.
Support JBKkutse with a gift today!