Even while Mac computers are generally incredibly effective, mistakes do occasionally occur on our part for obscene reasons. Like the mistake deletion of iMessages.
iMessage is a free instant messaging app from Apple. iMessage’s main function is to send messages, however, it also allows you to share contacts, photos, and videos with other Apple users for no cost at any time and from anywhere in the world.
It’s possible that you’ll occasionally want to delete older messages from iMessages in order to make room for newer ones. By doing this, you run the risk of unintentionally deleting something important to you. Don’t fret, the good news is, you can recover deleted iMessages on Mac and we are going to guide you through this in this article
How to Recover Deleted iMessages on Mac
1. Recover iMessages using Time Machine
If you’ve had a Mac for a while, you’re probably aware of the ability of Time Machine to back up and restore the data on your computer. You may keep a safe copy of all of your data using this program, which is Apple Mac’s principal backup solution.
Fortunately, you can retrieve your deleted iMessages using Time Machine. Because iMessage stores your messages in an offline file on your Mac computer, this is feasible. You can access an earlier version of this discussion and restore it using Time Machine. All of your previous, deleted messages on your Mac will be restored after this file has been recovered.
You can use Time Machine to get back all of your Mac’s deleted iMessages by following these steps.
Step 1: On your Mac, make sure the Messages app is not open. If so, choose “Quit Messages” from the drop-down menu under “Messages” at the top. The app will end as a result.
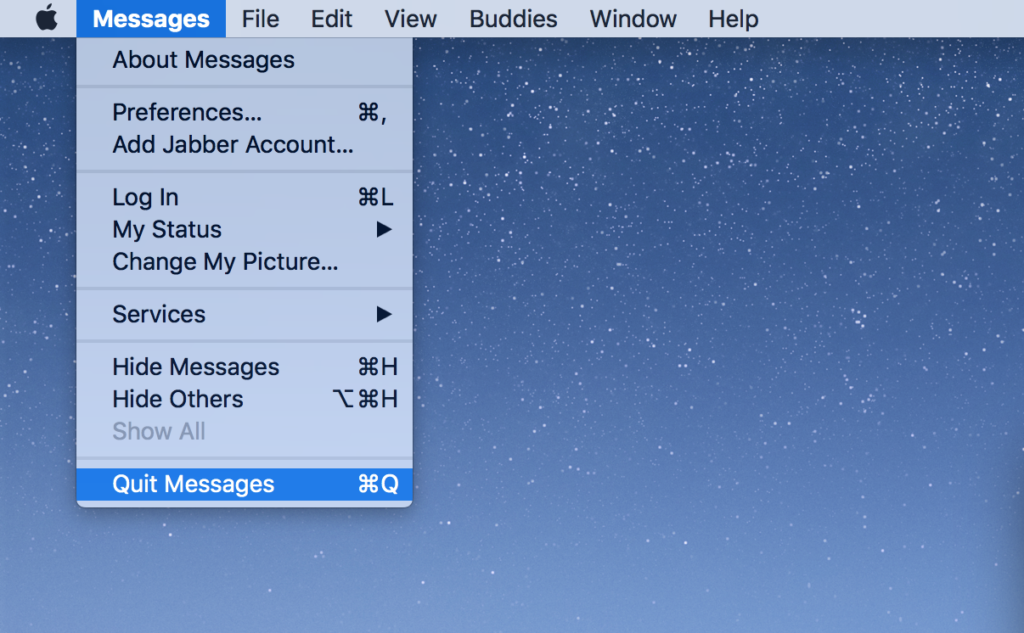
Step 2: The next step is to access the folder containing your saved iMessages. Open a Finder window, press the “Option” key on your keyboard while clicking the “Go” menu at the top, and choose “Library” to accomplish this.
Step 3: Double-click on the “Messages” folder you found to access it.
Step 4: Select “Enter Time Machine” by clicking the “Time Machine” button in the top menu bar.
Step 5: Locate the “chat.db” file’s previous version, choose it from the list, and then click “Restore”.
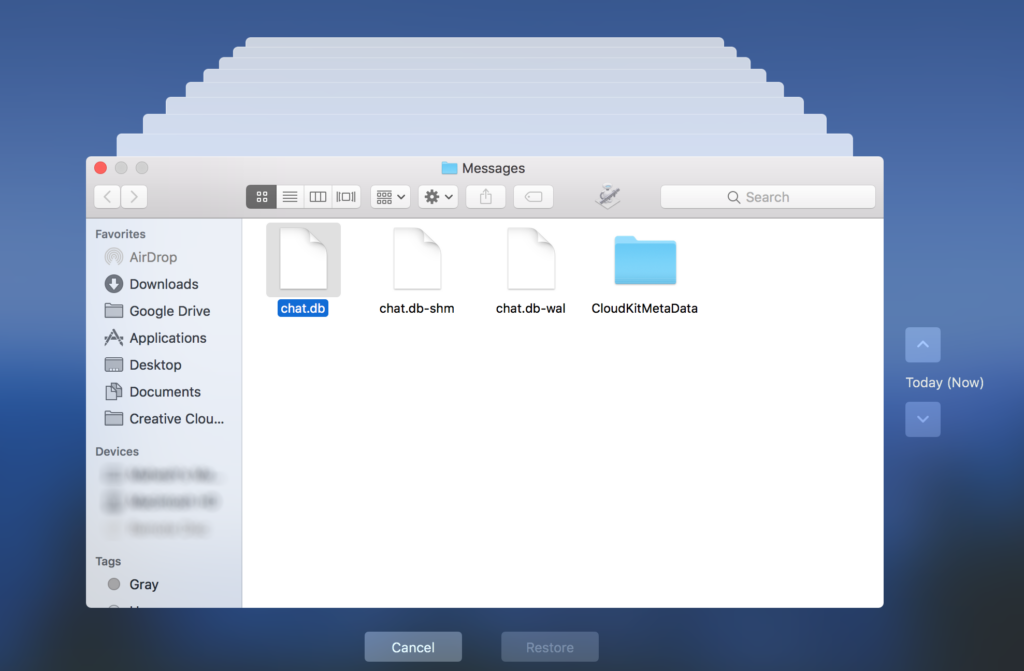
You should be able to find all of your deleted iMessages there because doing so will restore your previous discussions in the Messages app.
2. Recover Imessage from iCloud
Transferring, backing up, and restoring files on your Apple devices is a breeze using iCloud. This service comes with a lot of features that you may use without paying anything; you only have to pay when your free storage space is exceeded. It is very possible that your lost iMessages are still present in your iCloud backup if you use an iPhone or iPad with iMessages and backup your device to iCloud.
When you choose iCloud as your preferred method for backing up your iOS device over iTunes, this is typically the case. All of your data, including your messages, is kept on iCloud when you back up the device. Then, when necessary, you may restore your backup from iCloud, which will restore all of your messages on your iPhone, iPad, and Mac devices, including the ones that have already been erased.
You’ll need to wipe clean your iOS device in order to restore your iMessages from iCloud. This implies that before you can restore an iCloud backup, all of the data currently present on your iPhone will be deleted. The actions listed below should be followed to continue with this.
Step 1: Open the “Settings” app on your iPhone or iPad, then select “General”.
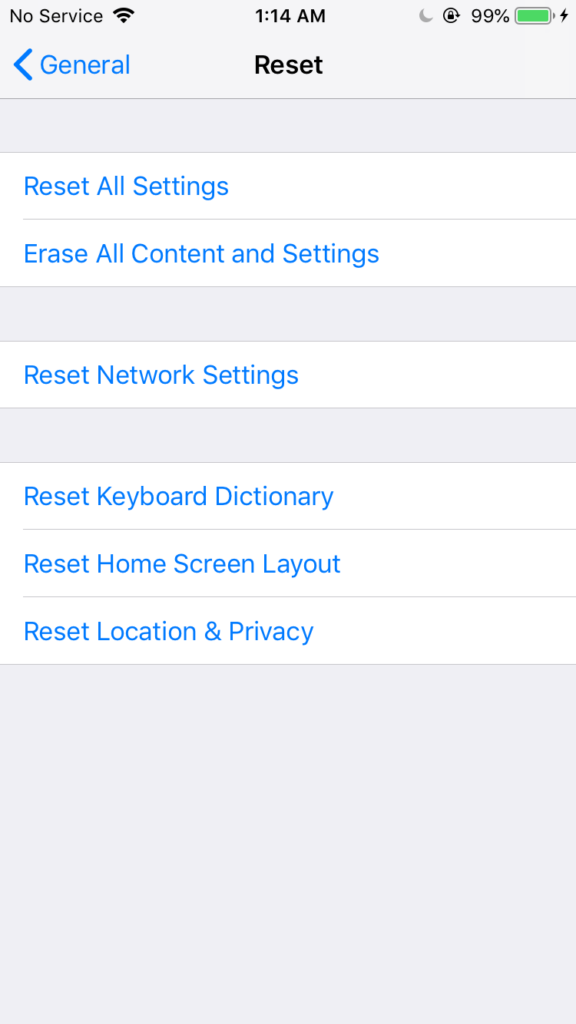
Step 2: Choosing “Reset” and tapping “Erase All Content and Settings” after you have reached the bottom of the page.
Step 3: Configure your device as a new one. Select “Restore from iCloud Backup” once you are on the “Apps & Data” screen.
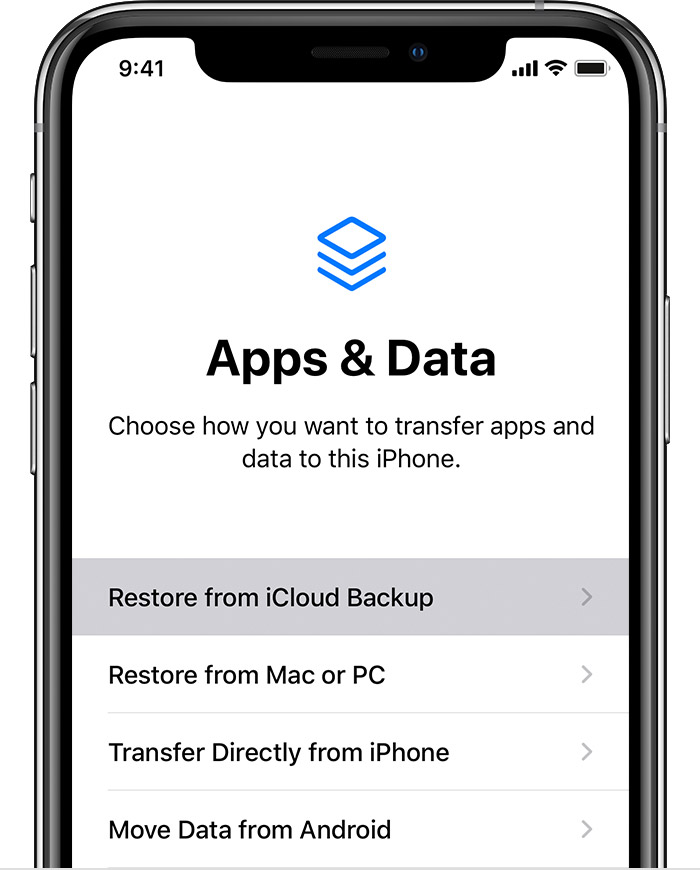
Step 4: Choose the previous backup you made before deleting your iMessages, then restore it to your phone.
All of your deleted iMessages will still be present on your smartphone once the backup has been restored. These can be synced with your iCloud account so that they also appear on your Mac.
3. Recover Imessage with EaseUS Data Recovery Wizard for Mac
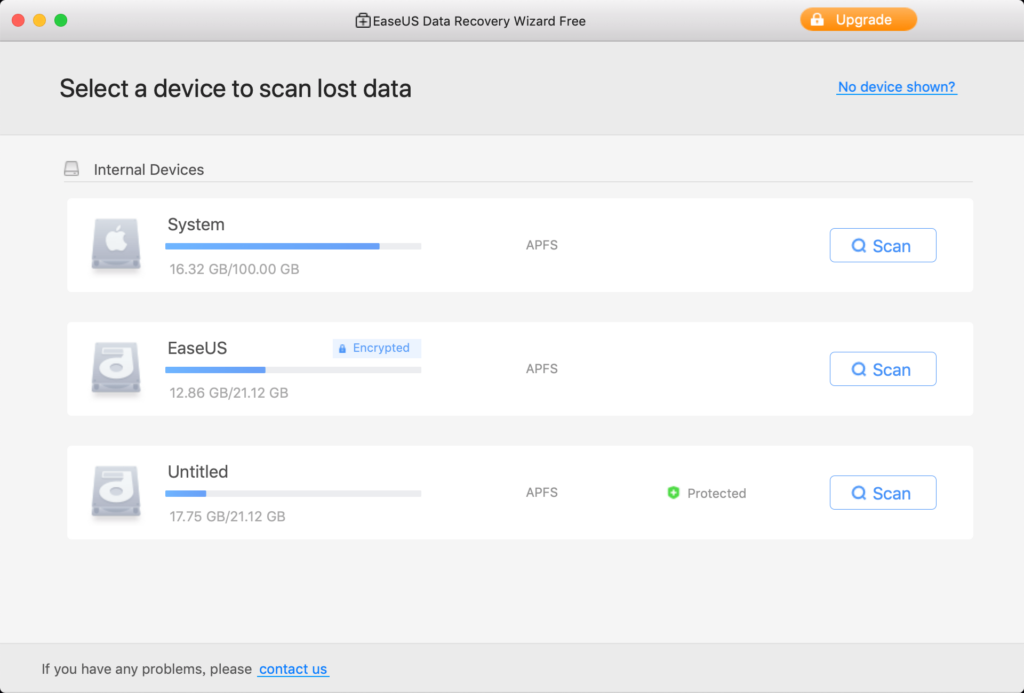
Step 1: Scan Your Drive for Messages
When you start the program, it will ask you to choose the drive where your iMessages are stored. The system drive is where your messages are typically stored, so choose it from the list and then click “Scan” next to the drive.
Step 2: Look for lost iMessages
Give the software permission to search your drives for recoverable data. Typically, this is all of the data that the tool can salvage for you. You will be able to see the findings on your screen after the scan is complete. Your iMessages history can be found by looking through these files.
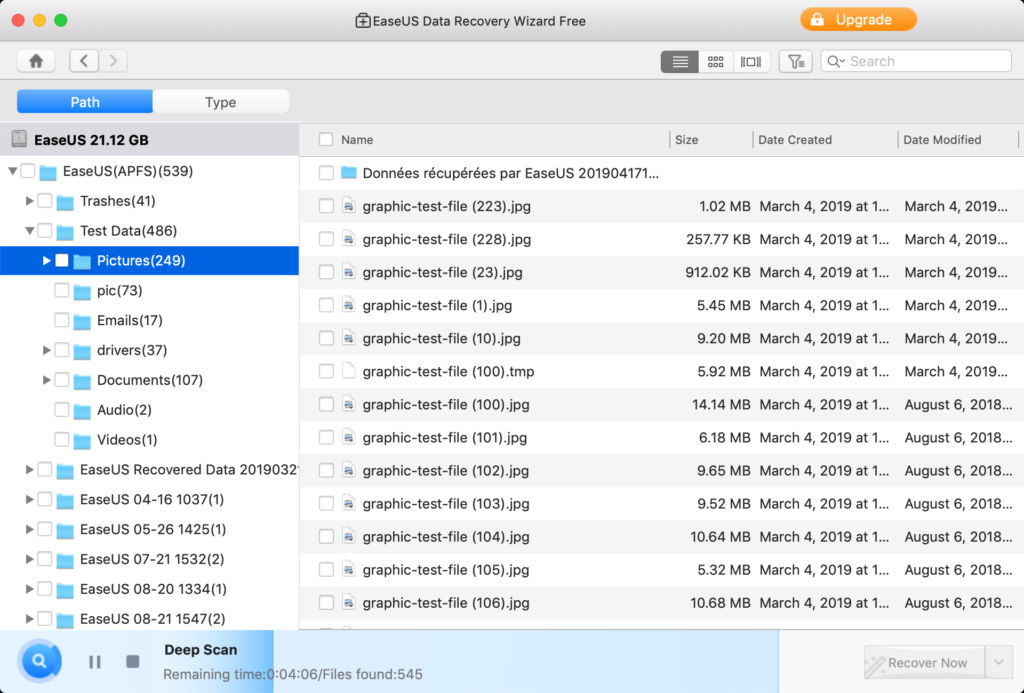
Step 3: Retrieve Deleted iMessages
Select all of the files in that folder after you have located your missing iMessages, which are typically found in the “/Library/Messages” folder, and then click the “Recover Now” option in the lower-right corner.
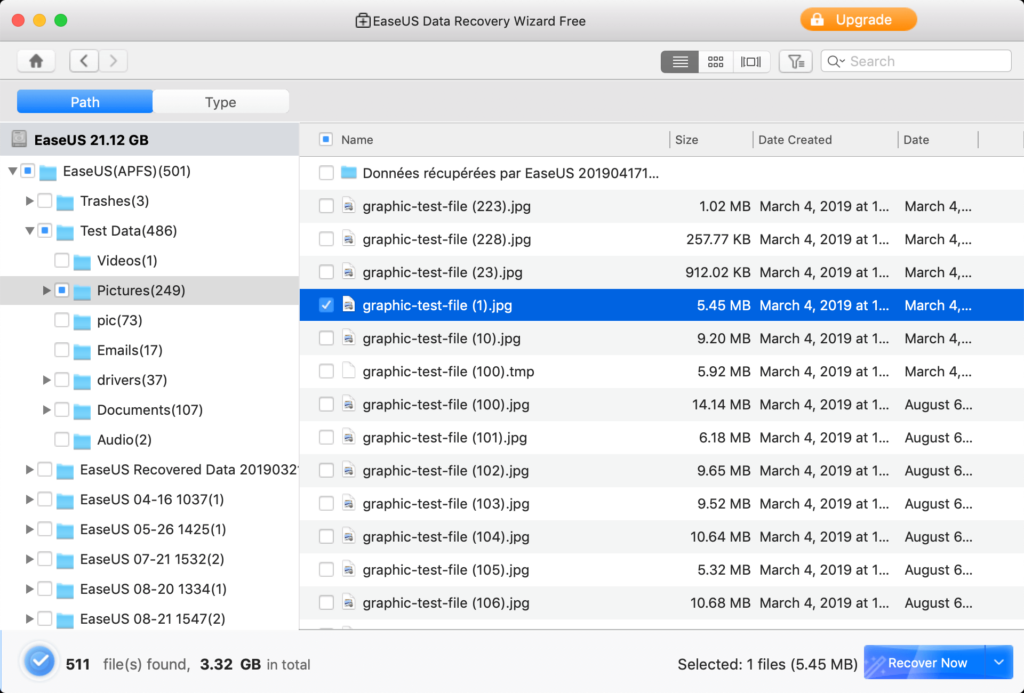
Your chosen files will be recovered and restored for you by the software.
Recover Imessage on iPhone/iPad
Step 1: Launch the Messages app on your iPhone or iPad.
Step 2: You can search for the deleted message by scrolling through the conversations.
Step 3: Use the search feature if you are unable to locate the deleted chat. The search box will appear after you scroll a little bit down to do this. You can find your messages by typing your search term in the box.
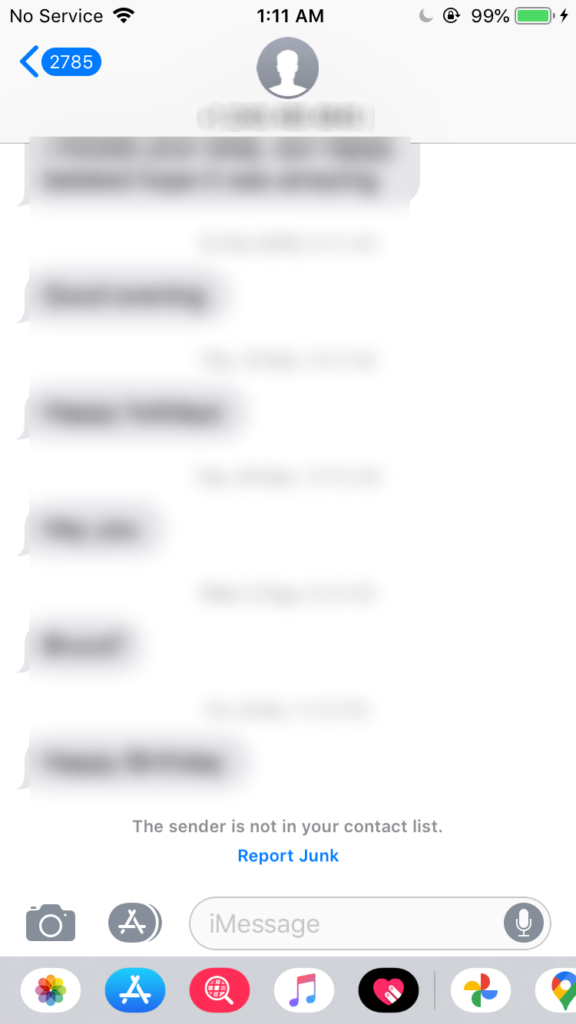
Step 4: When you tap your message, the entire conversion screen will open. Despite the fact that it was wiped from your Mac, you may now view the entirety of any communication you had.
In conclusion, recovering deleted iMessages on your Mac is possible, thanks to the effective methods discussed in this article. Remember to act quickly, follow the step-by-step instructions, and keep backups to prevent data loss.
With these tools at your disposal, you can confidently retrieve your important iMessages and regain peace of mind. Don’t let a simple deletion stop you from accessing valuable conversations and memories. Start recovering your deleted iMessages on Mac today!

Are you enjoying your time on JBKlutse?
Articles like these are sponsored free for everyone through the support of generous readers just like you. Thanks to their partnership in our mission, we reach more than 50,000 unique users monthly!
Please help us continue to bring the tech narrative to people everywhere through relevant and simple tech news, reviews, buying guides, and more.
Support JBKkutse with a gift today!